스프링 부트 - 스프링 시큐리티 설정 커스터마이징
- 웹 시큐리티 설정
WebSecurityConfigurerAdapter를 상속받아 시큐리티 관련 설정을 할 수 있다.
UserDetailsServie구현PasswordEncoder설정 및 사용
- 의존성 추가
1
2
3
4
5
6
7
8
9
10
11
12
13
14
15
16
17
18<dependency>
<groupId>org.springframework.boot</groupId>
<artifactId>spring-boot-starter-security</artifactId>
</dependency>
<dependency>
<groupId>org.springframework.boot</groupId>
<artifactId>spring-boot-starter-thymeleaf</artifactId>
</dependency>
<dependency>
<groupId>org.springframework.boot</groupId>
<artifactId>spring-boot-starter-data-jpa</artifactId>
</dependency>
<dependency>
<groupId>com.h2database</groupId>
<artifactId>h2</artifactId>
</dependency> - 스프링 시큐리티와 타임리프, H2 의존성을 추가한다.
Application.java1
2
3
4
5
6
7
8
public class Application {
public static void main(String[] args) {
SpringApplication.run(Application.class, args);
}
}HomeController.java1
2
3
4
5
6
7
8
9
10
11
12
13
public class HomeController {
("/hello")
public String hello(){
return "hello";
}
("/my")
public String my(){
return "my";
}
}SecurityConfig.java1
2
3
4
5
6
7
8
9
10
11
12
13
14
15
public class SecurityConfig extends WebSecurityConfigurerAdapter {
protected void configure(HttpSecurity http) throws Exception {
http.authorizeRequests()
.antMatchers("/", "/hello").permitAll() // 루트랑 hello만 인가
.anyRequest().authenticated() // 나머지 모든 요청은 인증이 필요
.and()
.formLogin() // form로그인을 사용할 것
.and()
.httpBasic(); // httpBasic authentication을 사용할 것이다.
}
}WebSecurityConfigurerAdapter를 상속받고configure메서드를 오버라이딩하여 시큐리티 설정을 커스터마이징 할 수 있다./(root) 와/hello에 접근할 때를 제외하고 나머지 모든 요청에 대해 인증이 필요하고, formLogin과 httpBasic을 통한 인증을 하도록 설정했다.
index.html1
2
3
4
5
6
7
8
9
10
11
12
<html lang="en">
<head>
<meta charset="UTF-8">
<title>Title</title>
</head>
<body>
<h1>Hello Spring Security</h1>
<a href="/hello">Hello</a>
<a href="/my">my</a>
</body>
</html>
hello.html1
2
3
4
5
6
7
8
9
10
<html lang="en">
<head>
<meta charset="UTF-8">
<title>Title</title>
</head>
<body>
<h1>Hello</h1>
</body>
</html>my.html1
2
3
4
5
6
7
8
9
10
<html lang="en">
<head>
<meta charset="UTF-8">
<title>Title</title>
</head>
<body>
<h1>My</h1>
</body>
</html>
- 위와 같이 설정하면 이전 포스팅에서와 달리 모든 요청에 대해 로그인 페이지로 이동하지 않고,
/my로 요청을 보낸 경우에만 로그인 페이지로 이동하게 된다.
H2 DB를 통한 유저 정보 생성 및 인증
1 |
|
- 사용자 계정에 대한 정보를 담는 Account클래스 생성
- DB와 어플리케이션 간의 데이터 이동이 있을 때 그 데이터에 대한 정보를 담고 있는 객체의 클래스이다.
- DTO (Data Transfer Object) 라고 한다.
SecurityConfig.java1
2
3
4
5
6
7
8
9
10
11
12
13
14
15
16
17
18
19
20
public class SecurityConfig extends WebSecurityConfigurerAdapter {
protected void configure(HttpSecurity http) throws Exception {
http.authorizeRequests()
.antMatchers("/", "/hello").permitAll() // 루트랑 hello만 인가
.anyRequest().authenticated() // 나머지 모든 요청은 인증이 필요
.and()
.formLogin() // form로그인을 사용할 것
.and()
.httpBasic(); // httpBasic authentication을 사용할 것이다.
}
public PasswordEncoder passwordEncoder(){ // 패스워드 인코더
return PasswordEncoderFactories.createDelegatingPasswordEncoder();
}
}- 시큐리티 설정을 관리하는 클래스에 패스워드 인코더를 추가
AccountRunner.java1
2
3
4
5
6
7
8
9
10
11
12
public class AccountRunner implements ApplicationRunner {
AccountService accountService;
public void run(ApplicationArguments args) throws Exception {
Account kwon = accountService.createAccount("kwon", "1234");
System.out.println(kwon.getUsername() + " password : " + kwon.getPassword());
}
}애플리케이션 실행 시 username이 kwon이고 password가 1234인 계정 정보를 생성하는 코드
- H2 데이터베이스에 저장된다.
AccountRepository.java인터페이스 생성1
2
3public interface AccountRepository extends JpaRepository<Account, Long> {
Optional<Account> findByUsername(String username);
}JpaRepository를 상속하여 DB에 의해 관리되는 데이터를 추상화된 형태로 접근할 수 있다.
findByUsername이라는 메서드를 생성하여 nsername을 기준으로 사용자 데이터를 가져올 수 있다.
AccountService.java1
2
3
4
5
6
7
8
9
10
11
12
13
14
15
16
17
18
19
20
21
22
23
24
25
26
27
28
29
public class AccountService implements UserDetailsService {
private AccountRepository accountRepository;
private PasswordEncoder passwordEncoder;
// 주어진 정보로 리포지토리에 저장
public Account createAccount(String username, String password){
Account account = new Account();
account.setUsername(username);
account.setPassword(passwordEncoder.encode(password)); // 패스워드를 인코딩하여 저장
return accountRepository.save(account);
}
// 입력받은 username에 해당하는 user정보를 확인하여 검증
public UserDetails loadUserByUsername(String username) throws UsernameNotFoundException {
Optional<Account> byUsername = accountRepository.findByUsername(username);
// 실제 데이터가 없으면 username을 찾지 못했다는 예외를 던지고 있다면 값을 받아온다.
Account account = byUsername.orElseThrow(()->new UsernameNotFoundException(username));
return new User(account.getUsername(), account.getPassword(), authorities());
}
private Collection<? extends GrantedAuthority> authorities() {
return Arrays.asList(new SimpleGrantedAuthority("ROLE_USER"));
}
}createAccount메서드는 주어진 정보로 계정을 생성하여 레포지토리에 저장한다.- 이때, 패스워드를 인코딩하여 저장하였다.
UserDetailsService는 반드시 구현해야 한다. 이 타입의 빈이 등록이 되어 있어야 스프링 부트가 자동으로 생성하는 유저가 생성이 안된다.- 보통 유저 정보들을 관리하는 서비스 계층에 구현을 한다.(여기서는 AccountService)
- 또는 서비스와 별개로 또 다른 클래스를 만들어서 그 클래스가
UserDetailsService인터페이스를 구현하도록해도 한다.
로그인 시에
UserDetailsService가 가지고 있는loadUserByUsername메서드가 호출이 되고, 입력된 username이 들어와서 입력된 패스워드를 검증한다.즉, 사용자가 보낸 정보와 DB에 존재하는 사용자 정보가 일치하는제 확인하는 역할을 수행한다.
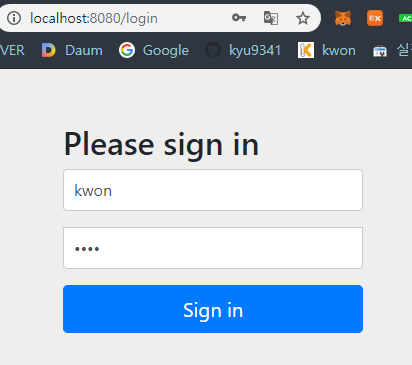
- 이제 애플리케이션을 실행하여
/my로 요청을 보내면 나오는 로그인 화면에서 위에서 설정한 username과 password로 로그인이 가능하다.
참조
https://www.inflearn.com/course/%EC%8A%A4%ED%94%84%EB%A7%81%EB%B6%80%ED%8A%B8/dashboard
https://engkimbs.tistory.com/807?category=767865